|
Development of the
Sandflea and Redbud Garden Railway
Adding
Rocks and Terrain
In early April 2005 I began planting sedum as
a ground cover in a few places. I took the "starts" from other
areas of my yard.
In April I began purchasing plants and pruning them for planting in
the garden. Most were in 1-gallon plastic containers. I bought 48 dwarf
Alberta spruce that were in smaller containers; I transplanted them into
1-gallon containers. Cost was definitely a factor in plant selection.
Following is a list of plants used:
Trees
Dwarf Alberta spruce (Picea glauca conica AKA Picea albertiana)
Dwarf nest spruce (Picea abies pumila)
Mugho pine (Pinus mugo mughus AKA Pinus mugo mugo)
Hick's yew (Taxus media hicksii AKA Taxus baccata x cuspidata
'Hicksii')
Dark green spreader Japanese yew (Taxus cuspidata densiformis)
Golden Japanese barberry (Berberis thunbergii aurea)
Winter gem boxwood (Buxus microphylla 'winter gem')
Emerald gaiety Euonymus (Euonymus fortunei 'emerald gaiety')
Dwarf yaupon holly (Ilex vomitoria 'nana')
Blue girl holly (Ilex merserveae 'blue girl' AKA Ilex aquifolium x crenata)
Variegated privet (Ligustrum sinensis variegata)
Tuscan Blue rosemary (Rosmarinus officinalis 'Tuscan Blue')
Dwarf heavenly bamboo (Nandina domestica)
Greenmound juniper (Juniperus procumbens nana 'Green Mound')
Ground cover
Sedum (various Sedum species)
Dwarf mondo grass (Ophiopogon japonicus 'nana')
Green creeping Jenny or moneywort (Lysimachia nummularia 'Green')
Golden creeping Jenny or moneywort (Lysimachia nummularia 'Gold')
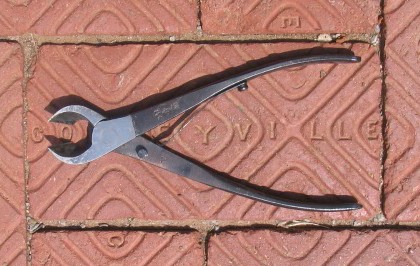 To properly prune the plants, a good pair of bonsai concave pruners are
needed. I bought mine online from Dallas Bonsai Garden. They cost $41 with
shipping.
To properly prune the plants, a good pair of bonsai concave pruners are
needed. I bought mine online from Dallas Bonsai Garden. They cost $41 with
shipping.
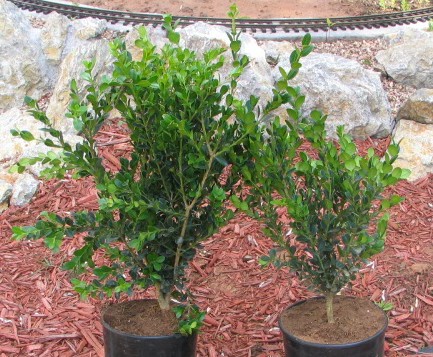
The following photos show how some plants were pruned. In almost all cases,
the lower branches were removed and foliage from the lower 1/4 to 1/3 was
removed to expose the trunk. I was conservative in this first pruning; more
pruning can be done when the plants are placed into "scenes." You
can use copper wire (with the insulation stripped off) to reshape branches,
but with over 100 plants, I thought it would be too much work to do that.
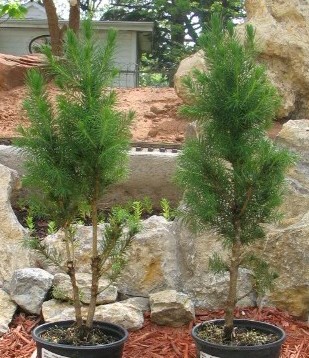
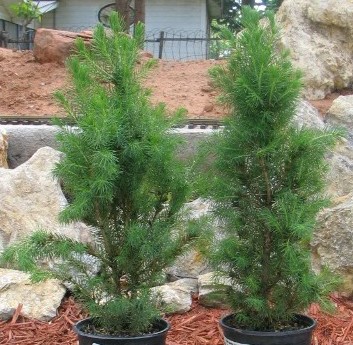 The two dwarf Alberta spruce on the left are untrimmed; the two below are the
same plants after pruning. Most of the spruce I purchased had either one main
trunk or two main trunks. For variety, I thinned a few higher up, and on a
few I left a branch or two near the ground. I paid $2.50 each for these at a
prominent discount store.
The two dwarf Alberta spruce on the left are untrimmed; the two below are the
same plants after pruning. Most of the spruce I purchased had either one main
trunk or two main trunks. For variety, I thinned a few higher up, and on a
few I left a branch or two near the ground. I paid $2.50 each for these at a
prominent discount store.
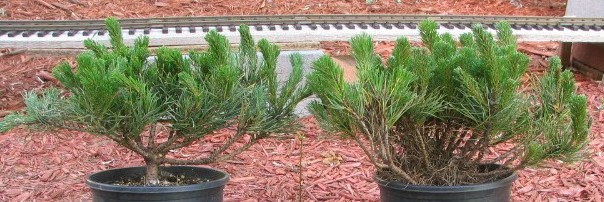 The photo on the left shows two Mugho pine, the one on the right unpruned,
and the one on the left pruned.
The photo on the left shows two Mugho pine, the one on the right unpruned,
and the one on the left pruned.
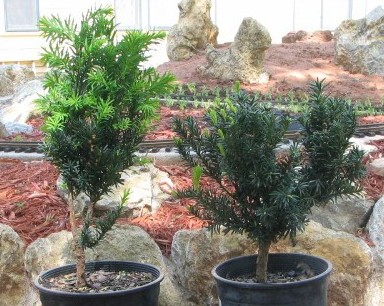 The photo on the left shows two Hick's yews after pruning. The one on the
left is pruned in a more upright style.
The photo on the left shows two Hick's yews after pruning. The one on the
left is pruned in a more upright style.
 The photo on the left shows two Yaupon hollies after pruning. The one on the
left has multiple trunks.
The photo on the left shows two Yaupon hollies after pruning. The one on the
left has multiple trunks.
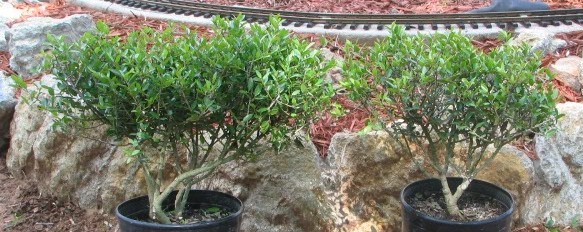
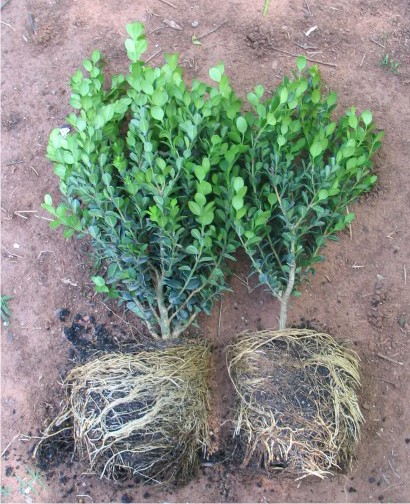
 The photo at the left shows two winter gem boxwood in the can. I selected
these to save money (two for the price of one), even though their forms might
be degraded by competition for space and sunlight. The photo below shows the
two plants out of the can and separated. I usually pruned the roots back
prior to planting.
The photo at the left shows two winter gem boxwood in the can. I selected
these to save money (two for the price of one), even though their forms might
be degraded by competition for space and sunlight. The photo below shows the
two plants out of the can and separated. I usually pruned the roots back
prior to planting.
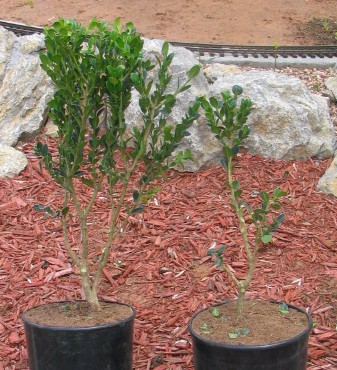
The photo
on the left above shows the same two plants repotted, each in its own can.
Note that the plant on the left branches lower down, while the one on the
right has a single trunk. The photo on the right above shows the two plants
after pruning. For the plant on the left I mostly opened up the trunks,
removed some lower branches, and trimmed back the top to a rounded form. For
the one on the left, I pruned it back severely to show the trunk, and I
reduced the top to a small ball. The upper foliage on both plants will
increase in size and density with time. Branches that are wrapped with wire
can be bent into more interesting forms. Boxwood train quite readily with
wire. Because it was thinned so severely and is so open, the single-trunk
tree on the right needs wiring.
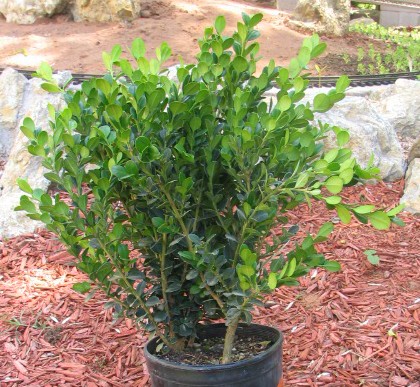
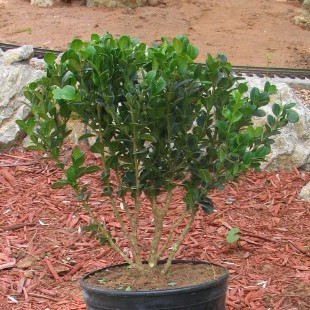
 The photo at the left shows another boxwood in the can. The photo below shows
the same plant after pruning. I removed the foliage from the lower part of
the tree to expose the branching, and trimmed the top into a rounded shape.
The photo at the left shows another boxwood in the can. The photo below shows
the same plant after pruning. I removed the foliage from the lower part of
the tree to expose the branching, and trimmed the top into a rounded shape.
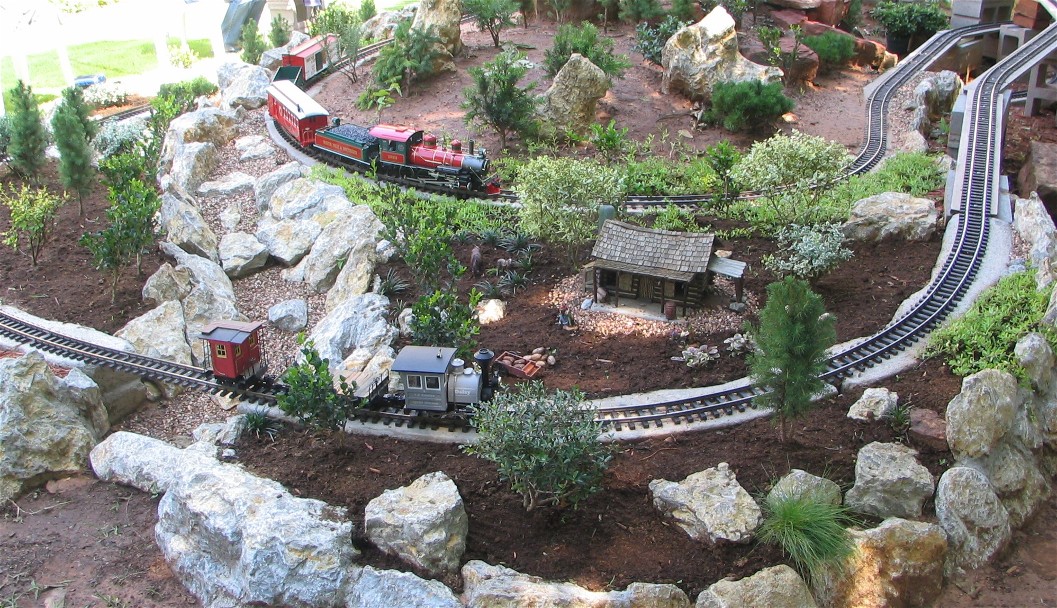
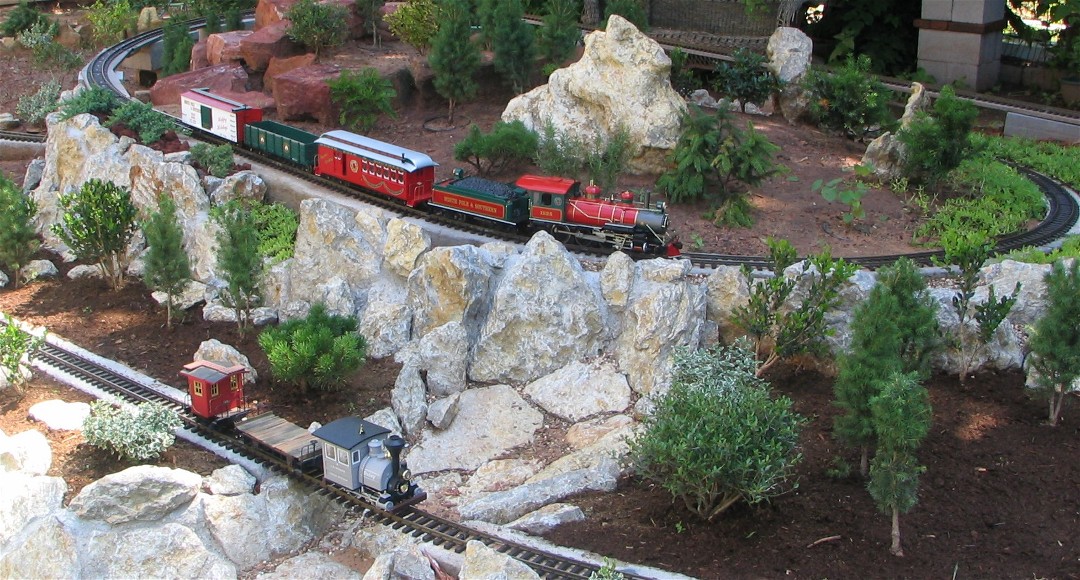 The photos at the left and below show my two functioning trains. The larger
engine is a Bachmann "Big Hauler" 4-6-0 Christmas Train; the train,
sound car, and cars came in a set. The smaller engine is an LGB
"Daisy" 0-4-0; the flat car and caboose were "kit-bashed"
from a Bachmann caboose.
The photos at the left and below show my two functioning trains. The larger
engine is a Bachmann "Big Hauler" 4-6-0 Christmas Train; the train,
sound car, and cars came in a set. The smaller engine is an LGB
"Daisy" 0-4-0; the flat car and caboose were "kit-bashed"
from a Bachmann caboose.
 I placed a layer of peat moss on the ground to prevent erosion. I slowly
began placing ground covering plants around the layout. However, in
Oklahoma, selection of groundcovers that will tolerate the summer heat and
the winter frost is low, and the prices are high.
I placed a layer of peat moss on the ground to prevent erosion. I slowly
began placing ground covering plants around the layout. However, in
Oklahoma, selection of groundcovers that will tolerate the summer heat and
the winter frost is low, and the prices are high.
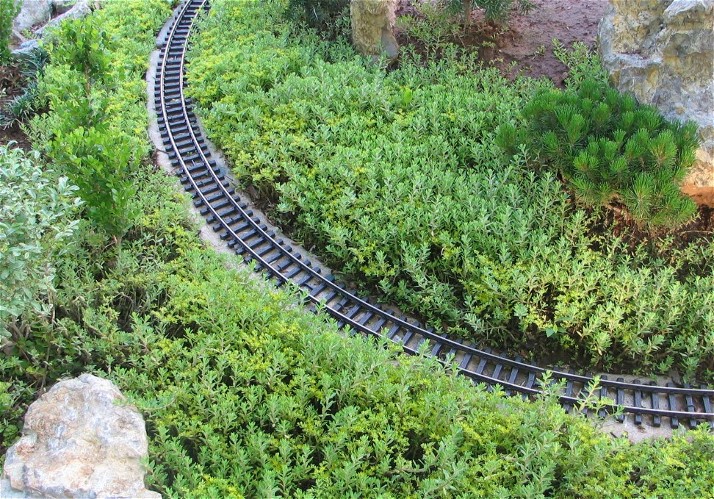 In the spring of 2005, I
experimented with several ground covers. I started with sedum for two
reasons - 1) I could transplant it for free from an area in my flowerbeds,
and 2) I knew that I could get thousands of "starts" from
cuttings. I pulled and cut several hundred sedum stems and planted each in a
shallow screwdriver hole. I got 100 percent growth. I had complete ground
coverage in about three months. The photo at the left shows sedum after
about a month out of winter dormancy. Note that it does creep over the
track; I have to trim it back with scissors every few weeks in the spring
and summer. The photo below shows how the sedum fills in around rocks and
other features. Note in the The sedum dies back to ground level in the
winter, but the root system shields the ground against erosion and
rainsplash. In the spring of 2005, I
experimented with several ground covers. I started with sedum for two
reasons - 1) I could transplant it for free from an area in my flowerbeds,
and 2) I knew that I could get thousands of "starts" from
cuttings. I pulled and cut several hundred sedum stems and planted each in a
shallow screwdriver hole. I got 100 percent growth. I had complete ground
coverage in about three months. The photo at the left shows sedum after
about a month out of winter dormancy. Note that it does creep over the
track; I have to trim it back with scissors every few weeks in the spring
and summer. The photo below shows how the sedum fills in around rocks and
other features. Note in the The sedum dies back to ground level in the
winter, but the root system shields the ground against erosion and
rainsplash.
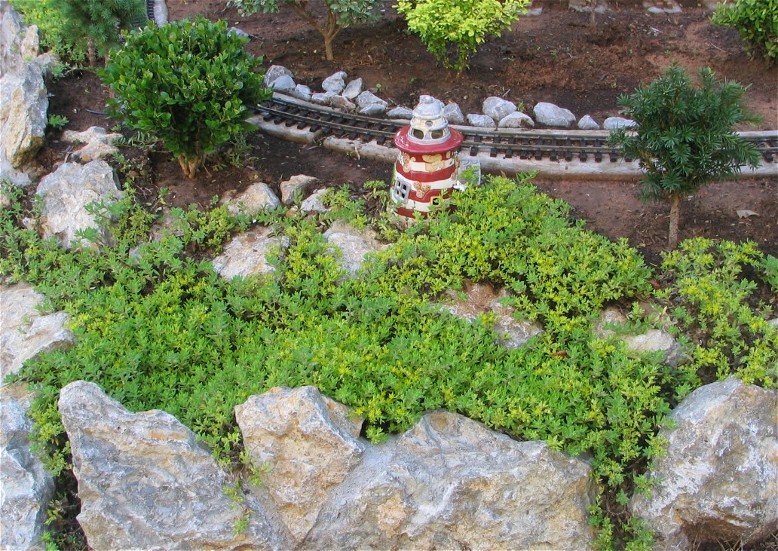
 The photo on the left shows sedum and two varieties of moneywort - golden
and green. The moneywort is a little out of scale, but it was relatively
cheap and spreads fast. It creeps over the track and must be trimmed back
regularly. The moneywort in the photo is still coming out of winter
dormancy.
The photo on the left shows sedum and two varieties of moneywort - golden
and green. The moneywort is a little out of scale, but it was relatively
cheap and spreads fast. It creeps over the track and must be trimmed back
regularly. The moneywort in the photo is still coming out of winter
dormancy.
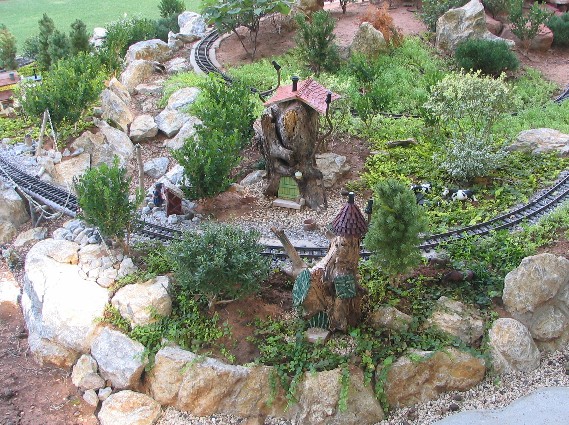 The photo on the left shows sedum (background) and two varieties (golden and
green) of creeping jenny or moneywort in August 2006.
The photo on the left shows sedum (background) and two varieties (golden and
green) of creeping jenny or moneywort in August 2006.
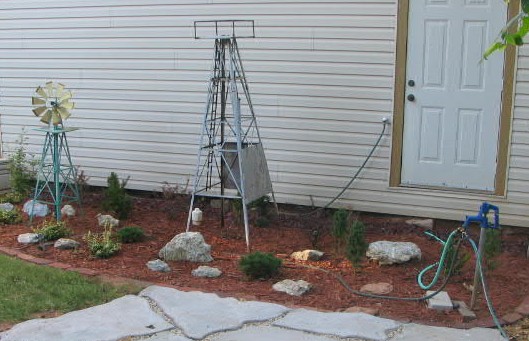 I also planted an adjacent bed (outside the railway garden) with a simlar
selection of plants to make the railway garden look less like an
"island." Because the plants in this bed were not planted in the
containers, they are expected to reach their normal sizes.
I also planted an adjacent bed (outside the railway garden) with a simlar
selection of plants to make the railway garden look less like an
"island." Because the plants in this bed were not planted in the
containers, they are expected to reach their normal sizes.
Back to the top of the page
Return to Garden Railway site index
|